

How To Make Animate Something Being Pulled In Maya
Yous can animate your rigged Character Generator model in Maya past setting keys or past applying movement capture to your model.
This chore likewise assumes your rigged customized graphic symbol is open up in Maya, and is ready to be animated.
Although Maya gives y'all a variety of different means to create animation and a wealth of tools for managing and editing animation, this task shows yous how to animate your character by setting keys to your character.
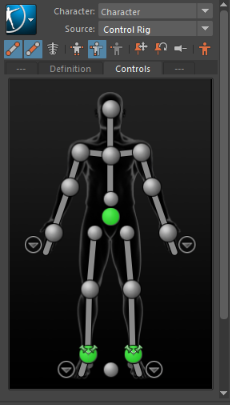
- Go to the Character Controls window and select the Controls tab if required.
Once you lot create a Control rig for your skeleton definition, the Character representation displays cells for each IK and FK effector in the rig. These cells provide visual feedback on the pinning, IK blend, and IK pull defined for each effector, and enable you to create and select auxiliary effectors and pin effectors.
Before you start setting keys to breathing your model, create an Blitheness layer where you can organize your keyframe animation while preserving the BaseAnimation layer intact.
- Create an Animation layer:
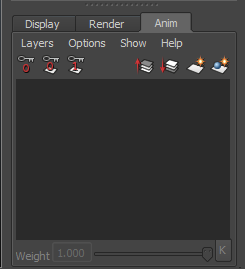
- Become to the correct of the Character Controls and select the Channel Box / Layer Editor.
The Layer Editor is displayed at the bottom.

- Select the Anim tab.
- In the Animation Layer Editor toolbar (
 ), click
  to create an empty Animation layer.
 The new Blitheness layer (AnimLayer1) is displayed past default to a higher place the BaseAnimation layer.
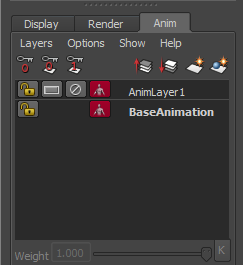
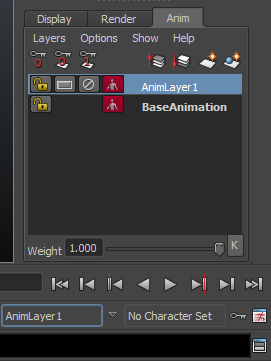
- Select the new Blitheness layer (AnimLayer1).
The AnimLayer1 is shown as the current Animation layer beneath the Playback Controls.
- Become to the correct of the Character Controls and select the Channel Box / Layer Editor.
- Get to the correct of the Aqueduct Box / Layer Editor and select the Character Controls.
The Controls tab toolbar (
 ) shows the keying mode is set up to Body Office (
  ).
). - In the Character representation, select an effector.
When yous select an effector, the effector is displayed with a blueish contour (
 ) and the effector is highlighted in green in the scene view.
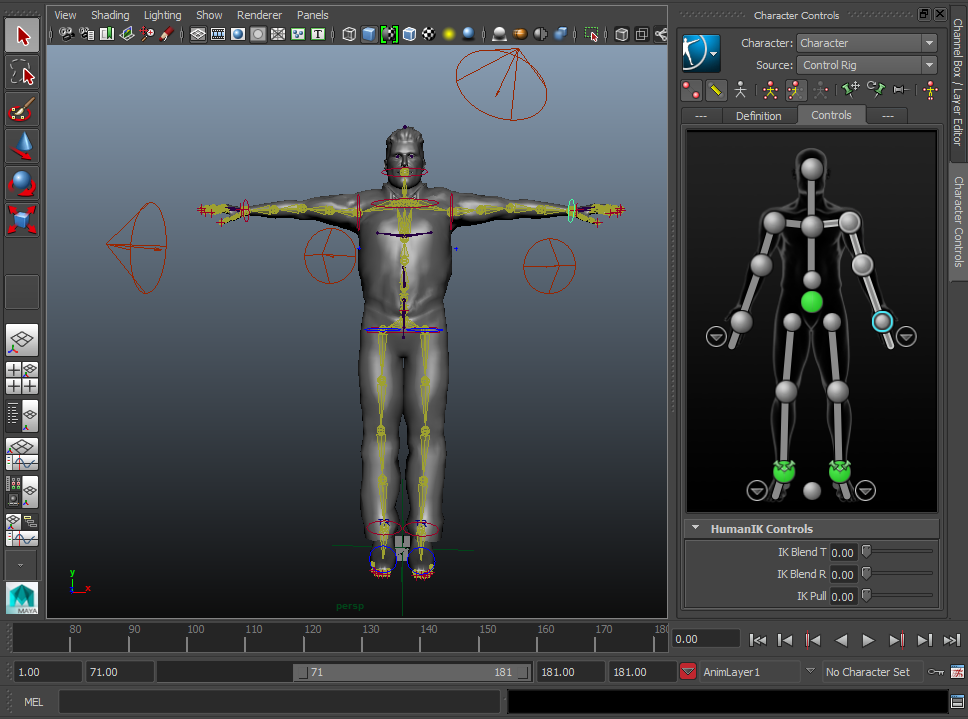
- On the left side of the interface, go to the Tool Box and select the Move tool (
 ) or use the keyboard shortcut west.
 The Movement manipulator is displayed in the scene view on the selected effector.
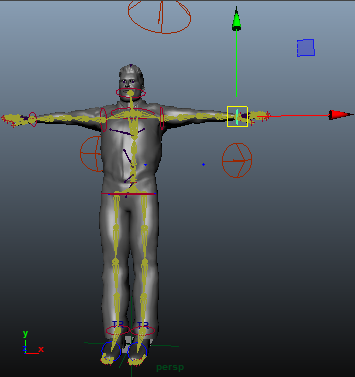
- Use the Move manipulator by dragging an arrow to change the position of the selected object along that centrality.
When the keying mode is fix to Torso Part (
), you change all the keyframes on the effectors that belong to the body office of the selected effector. 
- If you want to manipulate the entire character as opposed to a trunk role, undo the alter(s) to the position of your object past using the keyboard shortcut
 + Z.
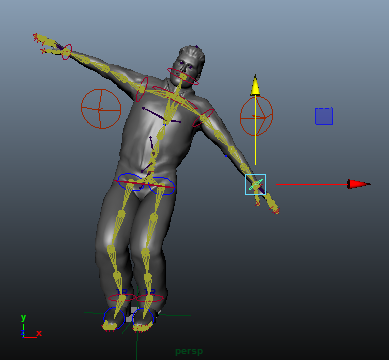
+ Z. - Go to the Controls tab toolbar ( ) and select the Full Body (
 ) keying way.
 - Use the Movement manipulator in the scene view to alter the position of the selected object.
When the keying mode is set to Full Torso (
), you can select individual effectors to manipulate the entire character. For example, translating a character'south wrist effector in Full Body keying mode affects the whole torso as it moves to reach that effector.
- Define the playback range:
- Go to the animation controls.
The following figure shows the playback range (below the time range) does not display the range values of the fourth dimension range.

The Range Slider bar lets you command the playback range of your animation upwardly to the limits of the Animation Get-go/End settings.
- Double-click the playback range.
The playback range is set to the range values in the Animation Kickoff/Cease fields.

- Go to the animation controls.
- Set keys:
- With the effector yet selected, press S. A cardinal is set at the current time.
- Select a time frame by clicking on the Time slider or by entering a time in the Fourth dimension Slider field.
- In the scene view, alter the position of the selected object.
- Set up a key. The visual feedback of the key is shown by a crimson vertical line in the Time slider.
- Select a fourth dimension frame, change the position of the selected object, and fix a key.
- Go to the Playback Controls (
 ) and click
  to play the animation.
Source: https://knowledge.autodesk.com/support/character-generator/learn-explore/caas/CloudHelp/cloudhelp/ENU/CharacterGen-Help/files/GUID-D379D034-3B3E-47AC-9B3C-F8B4D71095EF-htm.html
Posted by: penaectilow.blogspot.com
0 Response to "How To Make Animate Something Being Pulled In Maya"
Post a Comment